Cherry Pickin’…Sorta!

Hi All,

Not too long ago I visited my family in Seattle. It’s always fun because not only is Seattle a rockin’ place, but I get to see my 18 month old grandson, Jordan.

IMG_0093

What’s not to love about that face? He’s really cute and very smart….

Ok, I digress! His mom and dad are really into eating healthy so a lot of his food is natural and organic. While there this time, mom was fixing fresh cherries and removing the pits. Now you know I’ve never met a tool I didn’t like, so I was fascinated by the pit remover tool she was using. I’d never seen one before, so this was new to me and I was anxious to give it a try. Who knew? It might be a must have for my ever growing kitchen tool collection!

IMG_0025

Looks like something out of a Medieval torture scene, doesn’t it?

IMG_0028

Lining it up was a bit tricky. But that’s just me.

IMG_0029

Squeeze!

IMG_0030

Tah Dah!

It does work, and I think if you have little kids and choking on pits is a concern, this is the tool to have. I’ve since seen several other pit removing tools, some fancier, some plastic, etc…but this is functional and easy to clean, and for folks like me, easy to use. Did I run out and buy one? Nope. But then, for me, part of the fun of fresh cherries is the ability to suck on the pits for a while, and I don’t have any little kids in the house. Just Zack and Zoey, my furry children.

Toodles,

Silly food pic:

IMG_1231

Back in the Kitchen!

I haven’t been able to spend any time in the kitchen lately due to a lengthy – one month, actually – trip to Europe, so I’ve neglected this blog shamefully. I’m back, and though more trips are in the plans, they are not long, so I will be cooking and trying out all sorts of equipment. In fact, yesterday I bought a new small electric tool! You just can’t have enough tools in the kitchen, right? I will give it a try in the near future and will report back.

Just because I wasn’t actually cooking doesn’t mean I wasn’t paying attention to food. I was able to sample food from several countries and I loved all of it, but I think my favorite was a Belgium Waffle we ate in Belgium. While on a tour of Bruges, we wandered off the beaten path and found a little hole in the wall that offered the waffles. It only had two seats at a small counter and the proprietor was a nice young man who seemed very pleased to have customers! The menu offered a large variety of waffles but I stuck to the basics….and I was not disappointed. It was yummy, crispy and delish! I love Belgium Waffles and this one took the cake! (pardon the pun).

Take a look!

IMG_6793

I do have a waffle maker, so I think I’m going to try to duplicate this at some point. Need to do my research because this is no ordinary waffle! And I also want to duplicate the look of ecstasy you see here!

IMG_6796 IMG_6795

I will be cooking again this week, so let’s talk later!

Toodles,

Silly picture:

IMG_1203

Candied Peanuts

imageThe last couple of weeks have been incredibly busy. You know what I mean – you have to set an alarm to get up early every morning, and you’re buzzing around all day only to come home late and then you have to cook dinner! Then you fall asleep sitting on the couch, get up and go to bed, only to start all over the next day. That kind of week.

Anyway, one night I had to make a pie for a desert the following day, and in keeping with ” that kinda week” , I forgot to buy a key ingredient – honey coated peanuts.  It was too late to run out and get some so I had to improvise. I made candied peanuts. The recipe is below….but it was really easy and if I can do it, so can you. Truthfully, I think they tasted much better than the ones you buy in the store.

image


I started with dry roasted peanuts….make sure you don’t use the salted kind.  Then I mixed all the ingredients together in a medium pan and bring to a boil. Keep cooking until the sugar appears dry and coats all of the peanuts.

image 
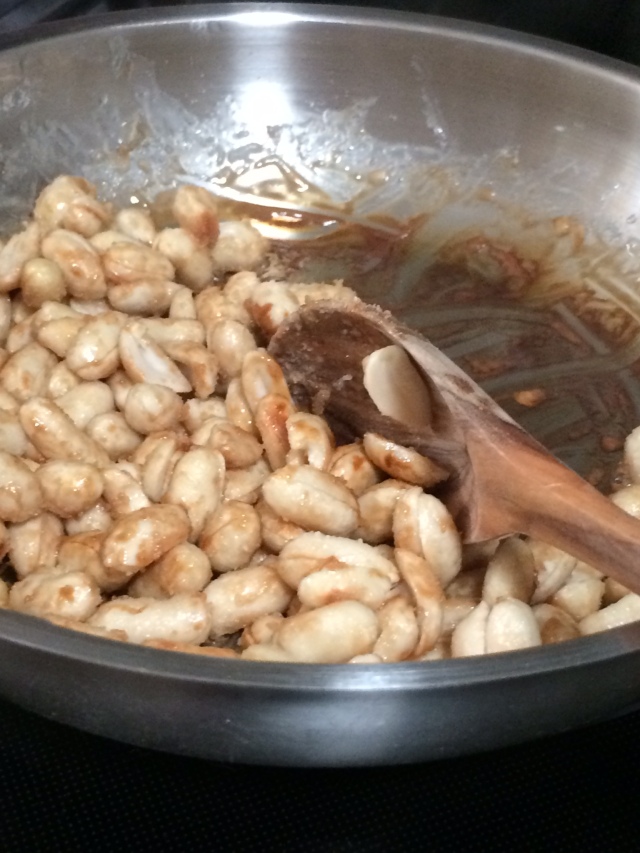
Lower the heat and continue to cook until the sugar turns Amber colored, then cook for another two minutes.


image

Remove the peanuts and spread on a parchment lined cookie sheet and allow to cool. And there you have it! Easy Peasy. You can serve as a pre dinner munchie or use them as an embellishment like I did on this pie.

imageHere’s the recipe:

1/2 cup dry roasted peanuts

2 tbsp sugar

2tbsp water

1/4 tsp salt

Combine all the ingredient in a medium pan and bring to a boil. Keep cooking until the sugar looks dry and coats the nuts.

Lower the heat and cook until the sugar turns amber in color, then cook for another 2 minutes. Remove from pan and spread on a parchment  lined cookie sheet and allow to cool. There you have it! Give it a try!

Toodles,

Silly food picture:

image


Roasted Red Peppers

America’s Test Chickenimage

I love roasted red peppers. My mom used to make them for holiday dinners and I anxiously awaited that grand meal every year. I’ve always been intimidated by the idea of making them myself…. not unusual since , until recently, most cooking intimidated me. I’m getting braver as I add and conquer new challenges in my kitchen but I still felt that buying a jar of roasted red peppers made more sense than actually making them. I didn’t know how easy it was!

If you’ve been following this or my other blog with my partner Karren, America’sTest Chicken, you know that we’ve been focusing on Indian cuisine. It’s been fun learning about the culture and food! One of the cookbooks we’ve been using regularly challenges us to make many ingredients from scratch and a recent recipe included roasted red peppers. I decided to accept the challenge and set out to make my own using the biggest, most red peppers I could find. Here’s how it’s done:

Preheat oven to 500 degrees. Place the whole peppers on a sheet pan and place in the oven for 30 to 40 minutes, until the skins are completely wrinkled and the peppers are charred, turning them twice during roasting.

image

Remove the pan from the oven and immediately cover it tightly with aluminum foil. Set aside for 30 minutes, or until the peppers are cool enough to handle.

image

Remove the stem from each pepper and cut them in quarters. Remove the peels and seeds. If you’ve really charred them and then cooled them down, they should peel very easily.

image


image

Now my recipe called for slicing the cooled peppers into several long pieces and storing until you’re ready to add to the dish but if you plan on serving up a plate of these beauties, place the peppers in a bowl along with any juices that have collected. Discard the stems, peels, and seeds. Pour the oil over the peppers and cover with plastic wrap. You can keep them in the refrigerator for up to two weeks.

Give it a try, you won’t be sorry!

Toodles,

Silly food pic:

image


Fire it up! Home Made Curry Blend

If you’ve been following my other blog America’s Test Chicken, written by me and my partner in all cooking crimes, you know we have been cooking Indian food of late. Last week we did a basic chicken curry that required a curry blend. Now if you don’t have time to make it yourself, look for Madras Curry blend in your grocery store. However, I made the blend my self, and I’m here to tell you….there’s absolutely no comparison!

Most of the recipes call for the blend to be added to whatever you’re stir frying so that the vegetables can act as a cushion to prevent the spices from being burned. If you add the spices to a preheated naked pan, or hot oil, you risk getting  burnt flavors and unappealing aromas.

chickencurry4Here, the spices are added to garlic and onions.

After searching high and low for an adequate spice grinder, I settled on an inexpensive electric coffee grinder. (I needed one I could use for pods, seeds  and bark and twigs! ) It also needed to have easy access and be easy to clean. This worked just fine.

IMG_6632

Here’s the recipe:

2 Tablespoons coriander seeds             1/2  teaspoon whole cloves

1 Tablespoon cumin seeds                      12 – 15 dried red cayenne chiles, stems discarded

2 teaspoons black or yellow mustard seeds

1 teaspoon black peppercorn                1 teaspoon ground turmeric

Place the coriander, cumin, mustard seeds, peppercorns, cloves and chiles in spice grinder and grind them to the consistency of finely ground black pepper. Stir in the turmeric, which will yellow the blend.

You can store the spice in a tightly sealed container away from light, heat and humidity  for up to 3 months.

Honestly, give this a try. It’s fabulous! And…if you stick your nose in it, like I did, it’ll clear your sinuses!

Toodles,

Silly food picture:

 IMG_6623

To Grate or Not to Grate….

Yes, to grate or not to grate. That is the question of the day! You all know I’m just getting back to the kitchen after years where my oven and other appliances basically stood idle, collecting dust.  So every new recipe and cooking experience is pretty exciting to me. (and yes, I have a life!) I’m loving the exploration and all I’m learning with Chicken One on our main blog, America’s Test Chicken – and the food ain’t bad!

This week we made home made egg nog. Oh my, very tasty! The main recipe called for nutmeg, which, if used fresh, required the use of a grater. Now you know I love kitchen tools. I confess (again) to being a tool addict! So which grater should I use??? So many tools, so little time!

DSCN0569

The long, thin, black handled one is my usual go – to grater. However, for this task, I found it too slow. (Actually grating nutmeg from a fresh nut is slow, but I’ll address that later!)  Anyway, much of the grated nutmeg stuck to the u shaped back side of the grater and it was annoying to scrape it out.

The next one I tried was the shorter, fatter red handled one. I think this one is probably better for cheese, because the nutmeg wasn’t fine enough to mix well in the egg nog.

Finally, I found one that was just right. (yes, I am quoting Goldilocks! Hey, I’m having fun here…) The last belonged to Chicken One and is one she brought back from Germany. It is easy to hold, the grip is great and makes the work go faster (if that’s really possible)  It actually stores 2 -3 whole nutmegs inside which is a plus for me since I’m organizationally challenged.

DSCN0570

It’s called WMF (don’t know what the initials stand for, but you can get creative!) and you can find it here.

So there you have it. I can vouch for the fact that fresh nutmeg is much better than what you buy in the jars at the grocery store. (unless you have a spice shop around the corner) However, when time is a factor – and it usually is with me – grating my own is just too slow. So….I’m going on Amazon and ordering an electric spice grinder. I’ll let you know how that turns out.  Until then, make some eggnog, bake some cookies, and have a Happy Holiday!

Toodles,

Silly food pic:

Image

Pumpkin Musings


pumpkins

Are you tired of Turkey and Pumpkin Pie?  I’m a little late with this entry but since this is Pumpkin season, let’s talk about them anyway! Now I might love to eat all things Pumpkin…in fact, I’ll even include the recipe for my favorite and much sought after Pumpkin Casserole here….but pumpkins that don’t come in a can remain a mystery to me.

Last year I thought I would make all manner of things pumpkin by going totally organic and using a real one. So I bought the biggest one I could carry from the market. Note to self (and anyone reading this)…bigger is NOT necessarily better!

First, according to all the recipes, I needed to get the insides out of this big beautiful mother of all pumpkins. I took the biggest knife I could find and cut and cut and hacked and hacked to no avail. I couldn’t cut it in half much less quarters. What was the secret???? I have countless friends who use real pumpkins so how do they do that???? Short of standing on my head, I did everything I could – and finally I got it in half. Now what?? I finally decided to ask Dr. Google…my go to guy in a pinch…and he said (or one of his minions) that I needed to roast it in the oven for a few minutes to soften the outer shell and it would be easier to  remove the pulp. Aha! So that was the secret! (of course he didn’t say how to fit a huge pumpkin into the oven without the hacking).

Now I admit, I got the pulp out  but when I tasted it, it didn’t taste at all like the pumpkin in a can. Yes, I’m really that naive! But even when I added all the spices, it just never quite got there. If you’ve been following my blog, you know I don’t have a lot of patience and am always looking for short cuts…..this doesn’t make my list, for sure. I vote for Libby’s canned pumpkin.

Never one to give up – I was determined to move forward so I decided to harvest the pumpkin seeds to roast them. This too is very time consuming! However,  I’ve always loved roasted pumpkin seeds as a snack so  it was going to be fun to make them myself.  Enter that devil Murphy and his negative law! I followed the directions, sprinkled them with salt and oil, spread them on a cookie sheet and put them in the oven. I swear I only turned my back for a sec…..but when I turned back around, smoke was bellowing out of the oven. Of course they were burned. I don’t know what it is with me and pumpkins….but from now on  I’m sticking to Libby’s!

Here’s the recipe I promised. Trust me, it’s phenomenal! You and everyone you serve it to, will love it!

Pumpkin Casserole

1(15oz) can Pumpkin

1 cup evaporated milk ( you can use regular milk, but don’t use as much)

1 cup sugar

1 tsp vanilla extract

1/2 tsp ground cinnamon

1 box butter flavored yellow cake mix

I cup chopped pecans

I cup butter, melted


Mix first five ingredients. Pour into greased 13 x 9 baking dish. Sprinkle cake mix evenly over mixture- sprinkle evenly with pecans then drizzle butter over pecans.

Bake at 350 degrees for I hour. The top will get too hard if you leave it in too long.

Enjoy!

Toodles,


Funny food picture:

funnyfood5

My Spiralizer Thingy – Swirl Your Way to Healthier Meals!

One of the reasons for loving to cook and experiment with new recipes and gadgets is the ability to create healthy or healthier versions of standard dishes.  Like Pasta!

Hey look, I’m Italian! Pasta is my life’s blood! Any size, any shape, covered in sauce, slathered in butter, drooling in Olive Oil…it doesn’t matter, it’s all good! However, we all know pasta is loaded with carbohydrates(the not so good kind), so I’ve been looking for healthier alternatives. (Don’t groan!)

Enter Zucchini pasta! Have you tried it??? I started by just finely chopping Zuchinni into thin strips. This works just fine but takes more time than I like to spend in meal prep. Then I tried this nifty little tool I found at Sur la Table

IMG_5684

It actually works really well, but I felt like I was wasting more vegetable than I wanted. Chicken #1 mentioned that she had bought a spiralizer while living in Germany that she really liked, so while at Williams Sonoma (and yes, if you’re thinking I stalk kitchen supply and foodie stores, you’re right!) I found the right one for me. Paderno World Cuisine, 4 – blade spiralizer. I LOVE IT!

Comes neatly packed!
And turns into this! It's magic!
And turns into this! It’s magic!

So this is what it looks like in action! You just attached the vegetable (aka Zucchini) and turn the handle….and ta dah! Zucchini pasta!

Just turn the handle!
Beautiful!
Beautiful!
Oh so yummy!
Oh so yummy!

So that’s my story….I’ve never found a gadget/tool I didn’t love or want to own.

Toodles!